frame
Howdy, Stranger!
It looks like you're new here. If you want to get involved, click one of these buttons!
Sign In RegisterHowdy, Stranger!
It looks like you're new here. If you want to get involved, click one of these buttons!
Quick Links
Categories
- 1.3K All Categories
- 7.3K General
- 6.2K General Discussions
- 412 Feature Request/Bug Report
- 545 Sales Questions and Answers
- 54 Time4VPS Life
- 242 Help requests
- 244 Server management
- 381 Tutorials
- 68 Various Tutorials
- 63 Web hosting control panels
- 133 Performance and Security
- 29 Web Applications
- 63 Linux Applications
- 25 Windows VPS
Howdy, Stranger!
It looks like you've been lurking for a while.
If you register, we also will remember what you have read and notify you about new comments. You will also be able to participate in discussions.
So if you'd like to get involved, register for an account, it'll only take you a minute!
[CSF] ConfigServer Security & Firewall installation on Webmin
 Valentine
Member

ConfigServer Security & Firewall (CSF) is a suite of scripts provides:
- A straight-forward SPI iptables firewall script;
- A daemon process that checks for Login Authentication;
- A Control Panel configuration interface;
- ... and much more!
0. Preliminary requirements:
"CentOS 6 + Webmin" template installed on server;
"perl-libwww-perl" installed on the server (yum install perl-libwww-perl -y);
Fully updates server software (yum update).
1. CSF installation
Installation of CSF is quite straightforward:
cd /usr/srcwget https://download.configserver.com/csf.tgztar -xzf csf.tgzcd csfsh install.sh2. CSF module installation in Webmin
CSF module installation is done through Webmin interface so first, you should log in to your Webmin instance. By default, the address is:
http://your-server-ip:10000
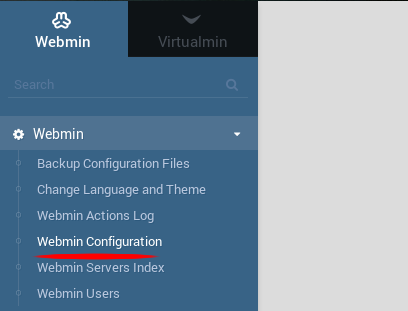
After successfully login you should select "Webmin" and "Webmin Configuration":

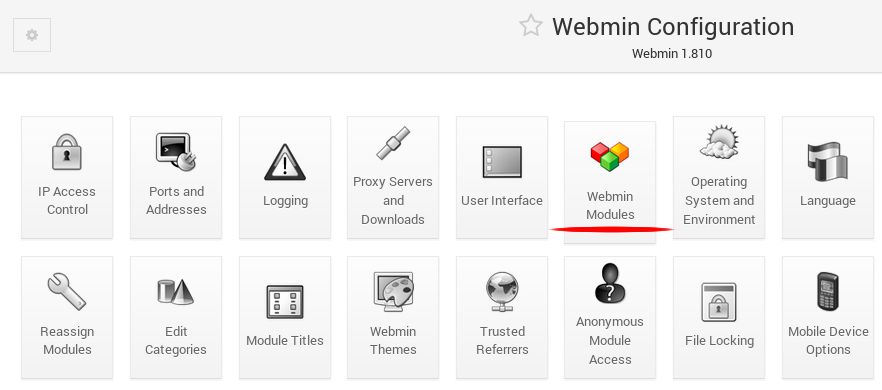
In "Webmin Configuration" select "Webmin Modules":
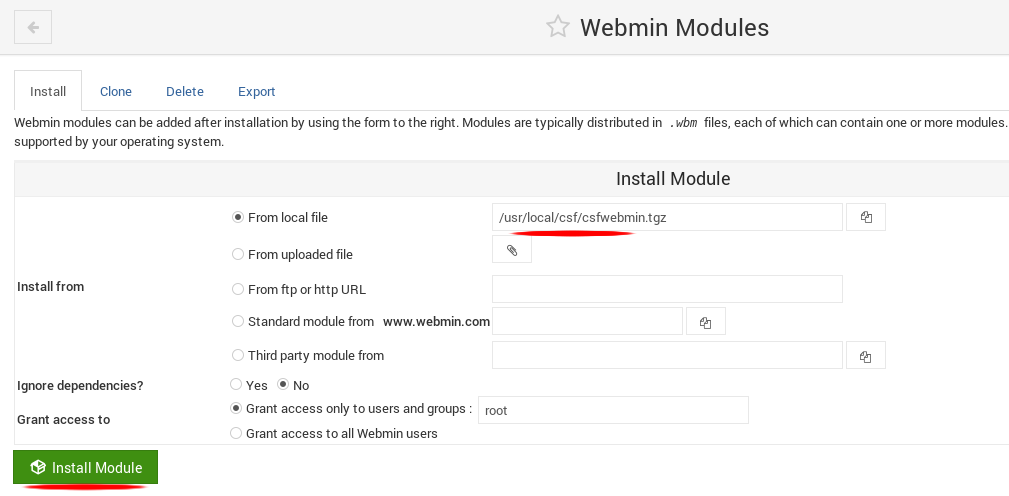
In "Webmin modules" select "From local files" and specify the path to module archive and isntall module.
/usr/local/csf/csfwebmin.tgz
NOTE: if you are using "Authentic Theme 18.10" you should remove "csf.min.js" file because of a bug:
rm /usr/libexec/webmin/authentic-theme/extensions/csf.min.js -f3. CSF configuration
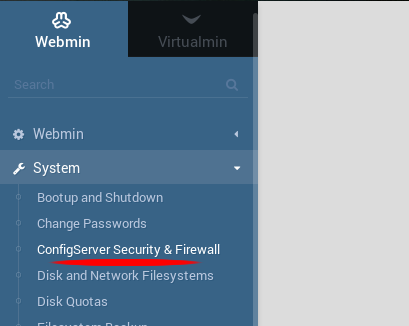
After successfully installation you can now configure your ConfigServer Security & Firewall. Select "System" and "ConfigServer Security & Firewall" in your Webmin instance:
You should now use the "Module config" button at the top left corner of the module:

First, we will turn of testing mode:
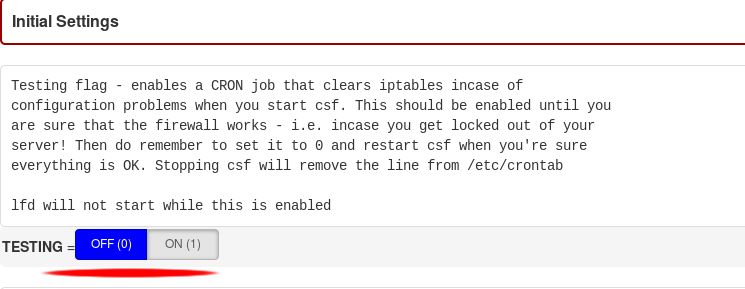
And then we should restrict syslog/rsyslog access:

After these changes press the button "Change" at the bottom of the page and "Restart csf+lfd" afterward.
That is it, now you have a fully working ConfigServer firewall. For more information regarding CSF please visit their Read me page.


