frame
Howdy, Stranger!
It looks like you're new here. If you want to get involved, click one of these buttons!
Sign In RegisterHowdy, Stranger!
It looks like you're new here. If you want to get involved, click one of these buttons!
Quick Links
Categories
- 1.3K All Categories
- 7.3K General
- 6.2K General Discussions
- 412 Feature Request/Bug Report
- 545 Sales Questions and Answers
- 54 Time4VPS Life
- 242 Help requests
- 244 Server management
- 381 Tutorials
- 68 Various Tutorials
- 63 Web hosting control panels
- 133 Performance and Security
- 29 Web Applications
- 63 Linux Applications
- 25 Windows VPS
Howdy, Stranger!
It looks like you've been lurking for a while.
If you register, we also will remember what you have read and notify you about new comments. You will also be able to participate in discussions.
So if you'd like to get involved, register for an account, it'll only take you a minute!
Rocket.Chat installation in CentOS 7
 Valentine
Member

Rocket.Chat is a Web Chat Server, developed in JavaScript, using the Meteor fullstack framework as a Slack alternative
It is a great solution for communities and companies wanting to privately host their own chat service or for developers looking forward to building and evolve their own chat platforms.
The tutorial was prepared with our "CentOS 7" template and is meant to work on our self-managed virtual private servers.
0. Preliminary requirements:
"CentOS 7" template installed on the server;
Removed Apache (yum remove httpd -y).
1. Installation of dependencies
The first thing we need to do is to install epel repository. For this enter command:
yum install epel-release nano -y && yum update -yNow we need to add MongoDB repository. Create new file "mongodb.repo" and paste repository info in it:
nano /etc/yum.repos.d/mongodb-org-4.00.re
[mongodb-org-4.0]We are now ready to install all the necessary dependencies:
name=MongoDB Repository
baseurl=https://repo.mongodb.org/yum/redhat/$releasever/mongodb-org/4.0/x86_64/
gpgcheck=1
enabled=1
gpgkey=https://www.mongodb.org/static/pgp/server-4.0.asc
yum install -y nodejs curl GraphicsMagick npm mongodb-org-server mongodb-org gcc-c++npm install -g inherits nn 4.8.42. Rocket.Chat installation
The following commands will download and install the latest Rocket.Chat instance:
cd /optcurl -L https://releases.rocket.chat/stable -o rocket.chat.tartar zxvf rocket.chat.tgzmv bundle Rocket.Chatcd Rocket.Chat/programs/servernpm install3. Creating auto start
We don't want for server restart to intervene with our Rocket.Chat accessibility. For that we have to enable Rocket.Chat auto start. Just create service file:
nano /usr/lib/systemd/system/rocketchat.serviceWith a text:
[Unit]NOTE: do not forget to change server-hostname with your server hostname.
Description=The Rocket.Chat server
After=network.target remote-fs.target nss-lookup.target nginx.target mongod.target
[Service]
ExecStart=/usr/local/bin/node /opt/Rocket.Chat/main.js
StandardOutput=syslog
StandardError=syslog
SyslogIdentifier=rocketchat
User=root
Environment=MONGO_URL=mongodb://localhost:27017/rocketchat ROOT_URL=http://server-hostname/ PORT=80
[Install]
WantedBy=multi-user.target
And enable this service by running:
systemctl enable rocketchat.service4. Launching Rocket.Chat
We are finally ready to launch our Rocket:
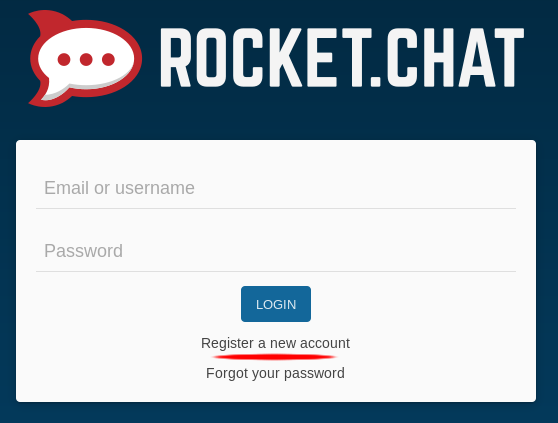
systemctl start rocketchat.serviceOpen http://server-hostname with your favorite browser and register a new account:

For Rocket.Chat user guides please visit - https://rocket.chat/docs/user-guides/
Tagged:


Comments
Thank you for your very fast response!
Can you explain how to add TLS (using Certbot / Let's Encrypt) for this tutorial?