frame
Howdy, Stranger!
It looks like you're new here. If you want to get involved, click one of these buttons!
Sign In RegisterHowdy, Stranger!
It looks like you're new here. If you want to get involved, click one of these buttons!
Quick Links
Categories
- 1.3K All Categories
- 7.3K General
- 6.2K General Discussions
- 412 Feature Request/Bug Report
- 545 Sales Questions and Answers
- 54 Time4VPS Life
- 242 Help requests
- 244 Server management
- 381 Tutorials
- 68 Various Tutorials
- 63 Web hosting control panels
- 133 Performance and Security
- 29 Web Applications
- 63 Linux Applications
- 25 Windows VPS
Howdy, Stranger!
It looks like you've been lurking for a while.
If you register, we also will remember what you have read and notify you about new comments. You will also be able to participate in discussions.
So if you'd like to get involved, register for an account, it'll only take you a minute!
Odoo installation in CentOS 7
 Valentine
Member

Odoo (formerly known as OpenERP) is a suite of enterprise management applications. Targeting companies of all sizes, the application suite includes billing, accounting, manufacturing, purchasing, warehouse management, and project management.
The tutorial was prepared with our "CentOS 7" template and is meant to work on our self-managed virtual private servers.
0. Preliminary requirements:
"CentOS 7" template installed on server;
Fully updates server software (yum update -y);
"Nano" text editor installed (yum install nano -y).
1. Server preparation
Before installation of PostgreSQL and Odoo we have to fulfill some prerequisites. For that use commands:
yum remove httpd sendmail bind -yyum install epel-release -yyum update -y2. PostgreSQL installation
After successful first step we are now ready to install PostgreSQL:
yum install postgresql-server -yFor proper function we have to initiate PostgreSQL data base by following these commands:
su postgres/usr/bin/initdb -E UTF8 -D /var/lib/pgsql/data -U postgresexitAnd for finishing installation we start PostgreSQL and enable it at server restart:
systemctl start postgresqlsystemctl enable postgresql3. Odoo installation
Now that we have everything we need for Odoo we can install it on our VPS. for that we first add Odoo repository. Create a new repo file and paste the content:
nano /etc/yum.repos.d/odoo.repo
[odoo-nightly]Install Odoo:
name=Odoo Nightly repository
baseurl=http://nightly.odoo.com/9.0/nightly/rpm/
enabled=1
gpgcheck=1
gpgkey=https://nightly.odoo.com/odoo.key
yum install odoo -yAfter installation is successfully finished we have to edit "openerp-server.conf" file and create our master password. Open a file and change the line:
nano /etc/odoo/openerp-server.confAnd change the line accordingly:
admin_passwd = Your_passwordAfter these changes we are now ready to start our Odoo instance and enable its start-up:
systemctl start odoosystemctl enable odooWe are now ready to open our Odoo system and finish its installation. open your favorite browser:
http://Your_VPS_IP_address:8069
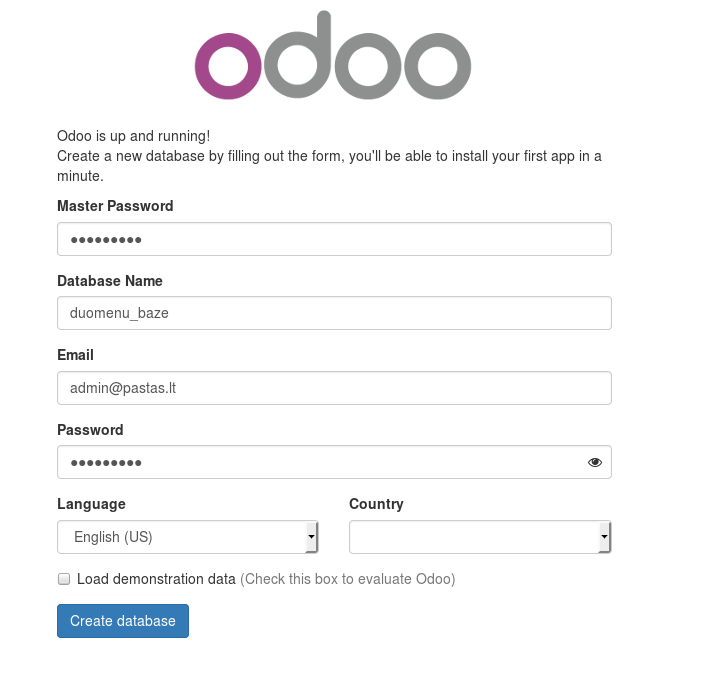
And finish the setup:

That's it. You are now ready to build your own Odoo system.
More information and documentation of Odoo can be found at - https://www.odoo.com/page/docs


